A new evaluation board is a blank slate. This one is a capable software-defined radio platform, but it shipped as bare hardware with a few low-level example programs and no operating system. Standing up a usable Linux on a board like this is normally a week of careful, one-step-at-a-time work.
This time the whole bring-up was driven by an AI. It connected to the board, tested each piece of hardware, read the results back off the chip, built and installed Linux, watched the boot log, fixed what broke, and repeated. The engineer set the plan and the order of work. In a day the board went from powered-on hardware to a login prompt, with ssh working over the network.

What the board is
It is a single board carrying two large AMD chips. One is a Zynq UltraScale+ RFSoC (the XCZU67DR): a quad-core Arm Cortex-A53 processor, a block of programmable logic, and a radio front end with eight receive and eight transmit channels running at 2.8 gigasamples per second. Beside it is a Kintex UltraScale FPGA (the XCKU115) that adds logic capacity. Eight high-speed serial lanes connect the two chips. Linux runs on the Arm processor inside the RFSoC.

Prove each layer before building on it
The bring-up did not jump straight to Linux. It climbed a ladder, and every rung left a log and a reading before the next one started. First the debug link, then the processor memory, then networking, then the boot devices, the logic-side memory, the high-speed lanes between the two chips, and the radio front end. Only once the foundation was proven did Linux go on top.
The processor memory passed a full pattern sweep across its four gigabytes with no errors. Gigabit Ethernet sustained 948 Mbps on a throughput test. The radio front end looped a tone straight back through an on-board connector and landed within a single frequency bin of where it was sent.
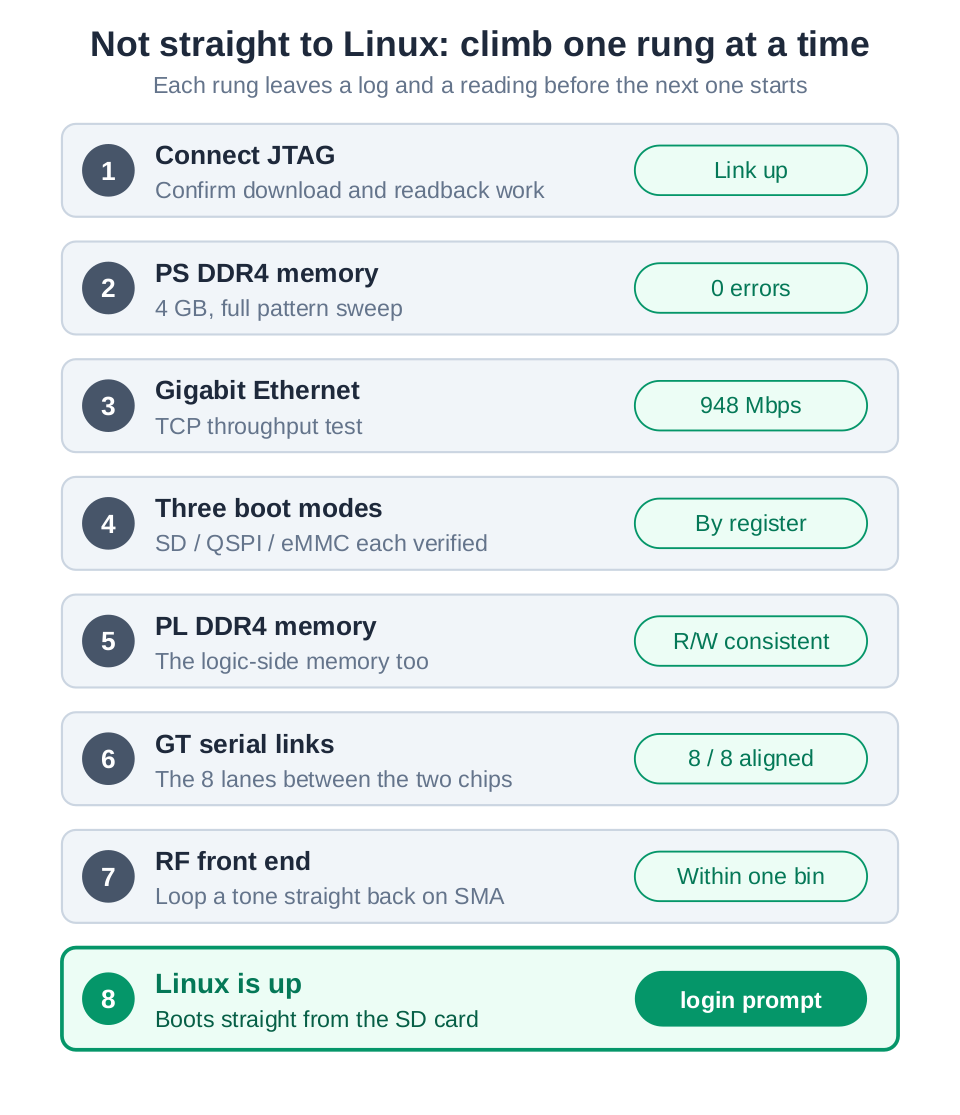
The reason to work this way is simple. If a step near the top fails and the foundation under it was never checked, there is no way to tell whether the new piece is broken or the base was never working. Climbing one rung at a time keeps a failure boxed into the rung where it happened.
How the Linux image was built
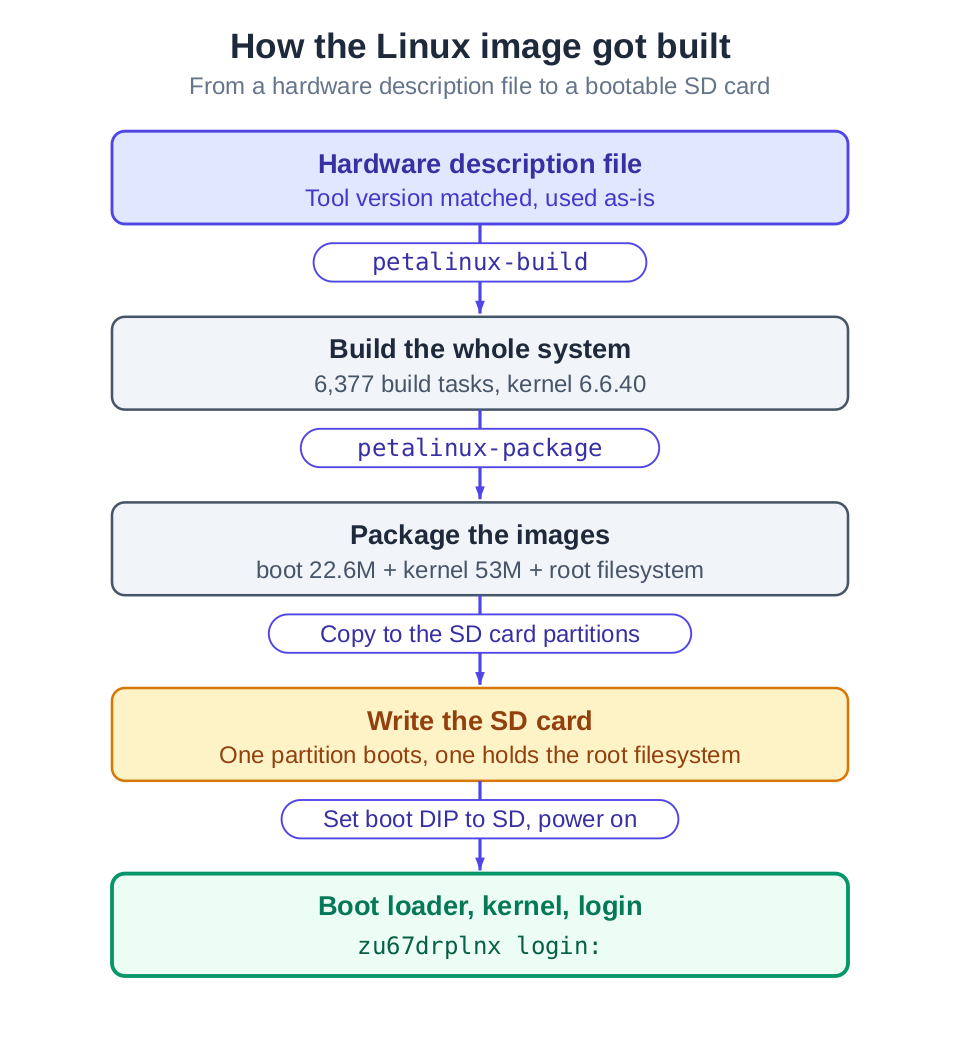
With the foundation proven, the Linux image itself was straightforward. The starting point is the hardware description file that comes with the board, and its tool version matched the tools on hand, so it was used as is. From there the build produced the whole system (6,377 build tasks, kernel 6.6.40), packaged it into a boot image, a kernel image, and a root filesystem, and wrote those to an SD card: one partition to boot from, one holding the root filesystem. Set the board to boot from the card, power on, and the boot loader brings up the kernel.
The payoff: a login prompt and ssh
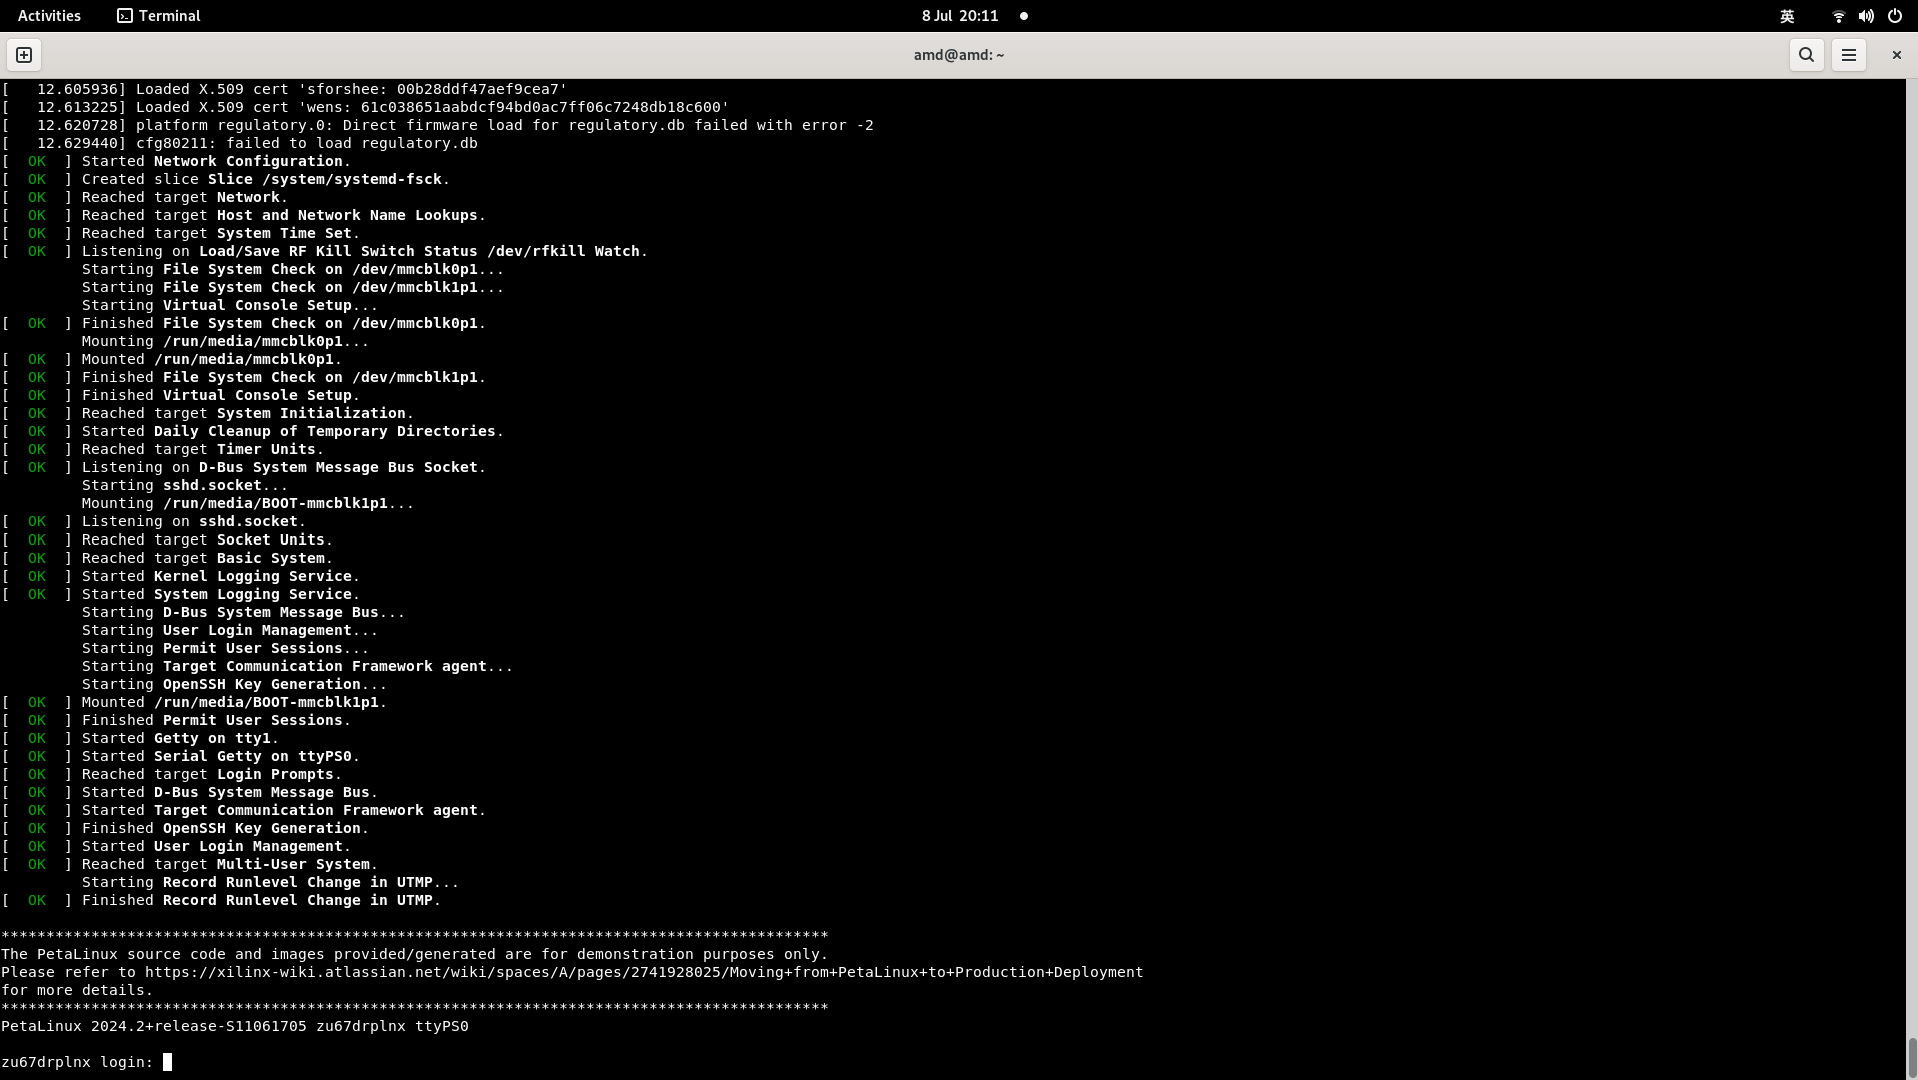
The board boots the kernel all the way to a login prompt. Log in, bring up the network interface, give it a fixed address, and it answers ssh from another machine. At that point the board stops being bare hardware and becomes a networked instrument an engineer can log into and drive.
Reading machine state, not guessing
The bring-up was not free of potholes. What kept it to a day is that each one was settled by reading the actual state of the machine rather than by guessing.
A boot-mode switch was ambiguous, so the boot-mode register on the chip was read directly to confirm which mode the board had actually entered. The first boot mounted a temporary root filesystem held in memory, which hid the real one, so it was traced and remounted from the SD card's root partition. A network interface name in the kernel settings did not match the hardware, so it was set to the name the board actually uses and the network came up. In each case the fix came from a reading, not an assumption.
Why this matters
The same discipline runs through everything we do: prove each layer against a real measurement before building the next one on top of it, and trust the state of the machine over what a document says it should be. That is how we bring up boards, and it is the same rigor behind our design services and our verified IP cores. The result is a working system you can measure and log into, proven layer by layer.